
Not sure we can superimpose decals for you.
IMPORTANT: To ensure that your decals last for as long as possible on your vehicle please follow instructions carefully:
Please read these introduction steps before reading the actual instructions. Inspect decals straight away when recieved to ensure no damage from delivery.
Store decals at room tempurature, away from sunlight and heaters / radiators and damp air.
Introduction
LAY THE DECAL OUT ON A FLAT SMOOTH SURFACE AND GENTLY RUB THE APPLICATION TAPE ONTO THE DECAL – (the application tape is very low tack to help application – it naturally starts to lift off – it will be binned at the end of the process but needs to be stuck to the decal for fitting
1. Offer up and Check Size before fitting.
2. Fit during the cool part of the day (Please ensure the body panel is cool and out of direct sunshine especially during a heatwave).
3. DO NOT fit in direct sunlight heat on a hot day – the vinyl could strech and the glue will be too soft to harden.
4. AVOID WASHING WITH A JETWASH OR CAR WASH BRUSHES.
5. Do not PREWASH WITH A VEHICLE SHAMPOO that contains wax.
6. After washing CLEAN BODYWORK WITH A NON AMMONIA CLEANER.
6. After washing CLEAN BODYWORK WITH A NON AMMONIA CLEANER.
7. Avoid wrapping around acrhes to ensure long life.
8. Indent when Trimming by 1mm or 2mm – It looks factory and looks professional!
9. Make sure that the bubbles are wiped out during inital contact with body work and immediatly after the application tape is removed (The glue cures and hardens within 20-30 minutes).
10. When removing bubbles, gently tease them toward the edge of the decal.
11. Make sure you have a nice cup of tea, read the below instructions carefully and do not rush!


Step 1
Any lifting of the edge of the decal can cause the decal to lift off the surface of your vehicle which will cause peeling.
1. It is recommended you install your vinyl decal in a garage or building. 2. Room and installation surface temperature is recommended to be between 10°C (50°F) and 20°C (68°F) to reduce stretching or other un-desired effects. 3. Do not store your vinyl decal in direct sunlight.
Materials Needed
– Installation squeegee (a credit card will do!)
– Masking tape
– Glass cleaner (non AMMONIA BASED)
– Paper towel
– Measuring tape or ruler.
– Scissors or Razor
Preparation
Remove all dirt, grease and/or wax from the surface before you install your vinyl decal. This includes wax from car washes, turtle wax, rain-x, compound, etc. Your new vinyl decal will NOT adhere properly if you do not have a clean installation surface.
Caution! Do not use ammonia based cleaner. It will out gas for a couple of weeks and create bubbles under your vinyl decal.
If you do not feel confident to fit your new Beatnik decal any local body shop will do it for you.
Step 2


Step 3
Place pieces of masking tape on top of the decal “pre-mask application tape” and surface to hold the decal in place.
Measure with a ruler or measuring tape to make sure your decal is properly lined up. Once in place, put a long piece of tape across the decal in the center as shown below. Remove the masking tape from one side of the decal and vehicle surface creating a hinged ‘flap’.
Step 4
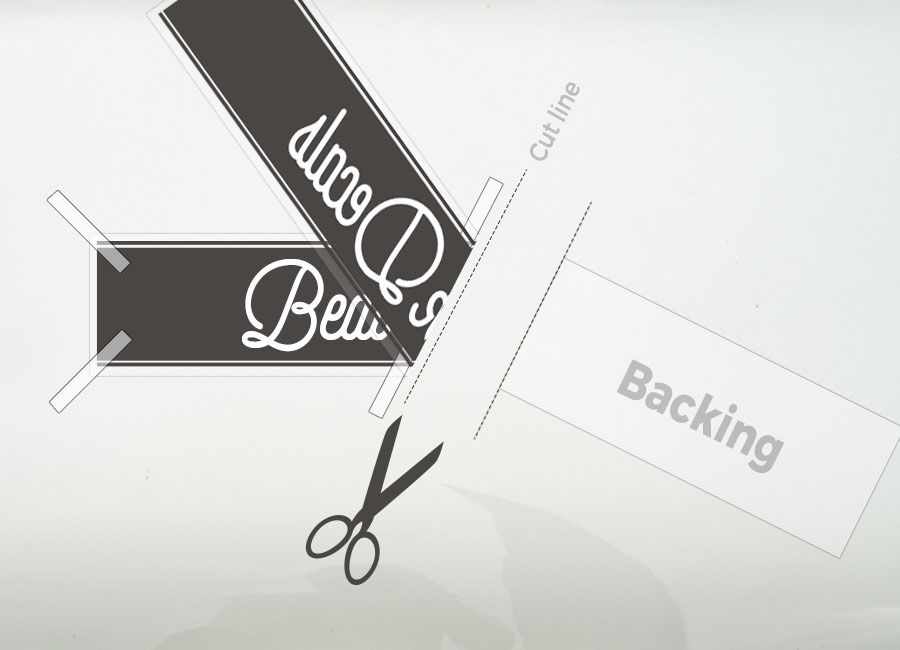
Raise the hinged ‘flap’, and begin to peel the backing “liner” off the decal (Not the Application tape), exposing the adhesive side of the decal. Only peel the “liner” from the decal until you reach the masking tape that crosses the whole decal.
DO NOT ALLOW THE STICKY PART OF THE DECAL TO TOUCH THE SURFACE YOU ARE APPLYING TO.
Using scissors or a razor, cut away the peeled “liner” close to the long piece of masking tape that crosses the decal. Do not allow the scissors or razor to touch the decal as it may stick accidentally peeling the decal off the “pre-mask”.


Step 5
Using your squeegee and starting in the middle where your masking tape crosses the decal, begin to apply the sticky side of the decal to the surface.
Use horizontal strokes to apply the decal equally. Continue smoothing out the decal from top to bottom with long horizontal strokes assuring the decal is securely adhered to the surface.
Step 6
Place a long piece of masking tape parallel to the current piece of masking tape that crosses the decal on the decal side that you just adhered to the surface.
Then remove the original long piece of masking tape that crossed the decal. This will secure the decal so you can peel off the final piece of “liner”. Also remove the small corner pieces of masking tape.
Slowly peel the final piece of “liner” off exposing the adhesive side of the decal. Once again do not allow the sticky part of the decal to touch the surface.


Step 7
Using your squeegee and starting in the middle where your masking tape crosses the decal, begin to apply the final sticky side of the decal to the surface. Use horizontal strokes to apply the decal equally. Continue smoothing out the decal from top to bottom with long horizontal strokes assuring the decal is securely adhered to the surface.
Step 8
Once completed leave your decal for 15mins, go make yourself a nice cup of tea. Once you’ve come back to it you can simply peel off the application tape and stand back to admire your handy work. Please note when trimming to gaps in the door panel it works really nicely to trim 1-2mm before the end of the panel – looks PRO and will make you deals last longer.
We hope you are as happy with your beatnik decal as we were designing them for you.</p><p> Be sure to send us any lovely pics you take and if it makes it onto our customer gallery page we’ll send you a voucher code as a thank you. Peace out!


ABOUT MENU
Your basket
Recently viewed
Reviews


Can’t rate Beatnik highly enough! Daniel was so patient and the price was great, even excluding all the time and effort that went into design. Decals arrived in perfect condition and look exactly like the mock up. Highly recommended.


Extremely helpful as i found out…I have no hesitation in passing this recommendation on for others to … a company willing to bend over backwards in making sure satisfaction guaranteed.. you’ve come to the right place 😉


Super quick turnaround and delivery. All in all, a great experience. Already had two bespoke designs from Beatnik and I’m sure we’ll be back for another. Thanks again!


Absolutely brilliant service..from providing screen shots of what the design would look.. quick turnaround and postage in excellent robust packaging and finally, a fantastic quality product


Thoroughly recommend this decal company. Website easy to use and our VW Camper stickers arrived with two days of ordering. Quality of the designs is excellent.


Great quality..fast efficient service..go above and beyond to get orders perfect, colours and designs sample was sent out..without me even asking..constantly getting a lot of attention. Great company. Highly recommended 😉


100% recommend…communication was brilliant. so pleased with the end result.


“Service…Attentiveness…Quality of products…Second to none”


Good quality, fast delivery! These graphics are awesome thanks!


Excellent Service and product, yet again. Highly recommended!

